Education Conference 4/23/20: The Ankle Evaluation

Education Conference 4/23/20: The Ankle Evaluation

At our education conference this week, we were lucky to have Dr. Kate Berz, Sports Medicine Physician at Cincinnati Children’s Hospital Medical Center, review high yield exam findings of ankle injuries presenting to the PED.

Evaluating an Ankle Injury in the Pediatric Emergency Department

A young teenage basketball player comes to the ED with an ankle injury.  He was playing in his game that evening and suffered an inversion injury of the ankle.  

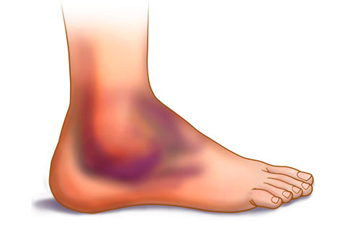
Here is what your patient's ankle looks like

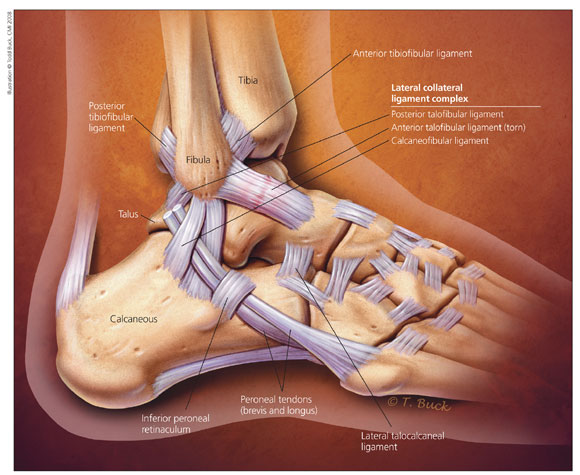
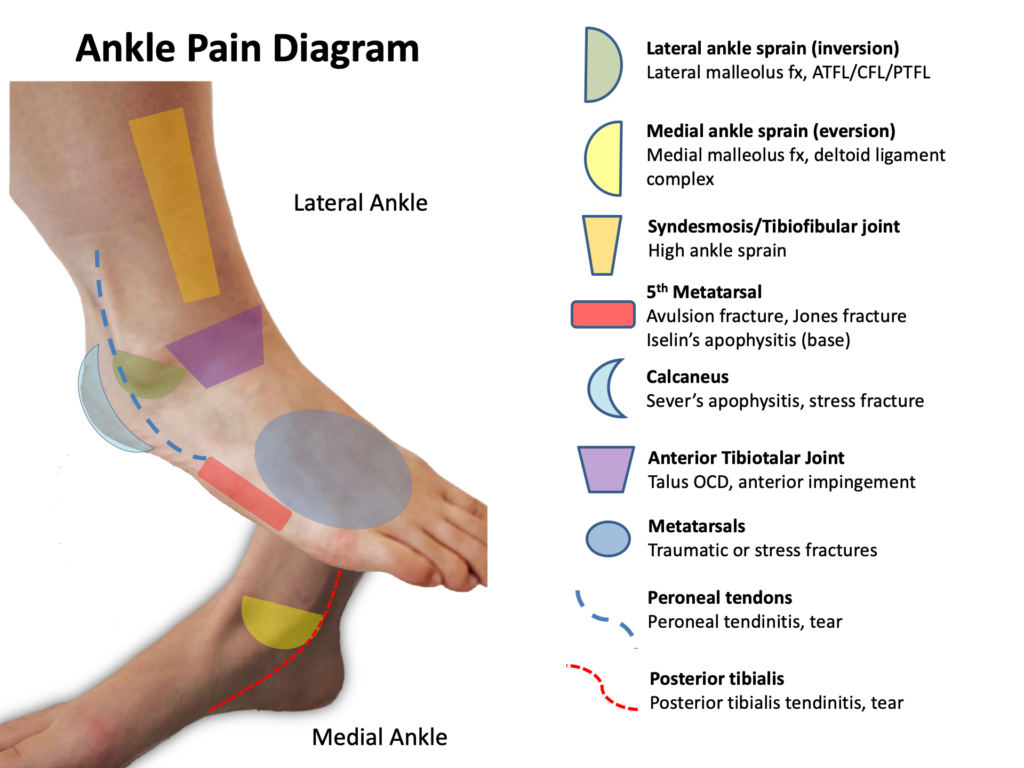
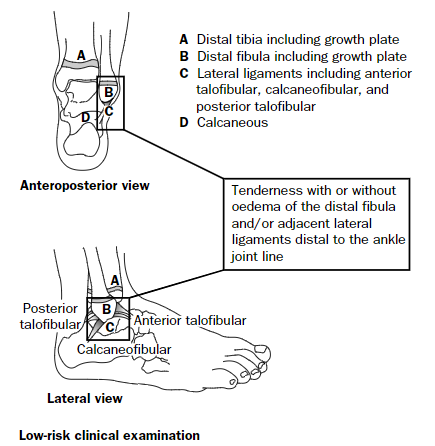
How do you want to evaluate his ankle? What are the important questions to ask? Are there any rules you can use to help guide your evaluation and work up?

Dr. Berz's Examination Pearls

Know your landmarks! If you know the anatomy of the ankle, you can focus your exam to understand the injury. As always in pediatrics, start where it doesn't hurt-- leave palpating the obvious injury for last!

Lateral Ankle Anatomy from HSS.edu

When Dr. Berz performs an ankle exam, she suggests starting at the proximal tibia and fibula, then moving down towards the ankle.  Be sure to perform the squeeze test on your way down to the ankle to evaluate for a tibiofibular joint injury.

Once reaching the base of the foot, Dr. Berz evaluates the metatarsals, being sure to evaluate the 5th metatarsal for pain.  If an inversion injury, she then moves to the medial malleolus, then calcaneus, and then the navicular bone.

Leaving the lateral ankle for last, she then palpates the distal third of the fibula down to palpate the three ligaments of the lateral ankle: Posterior talofibular ligament, anterior talofibular ligament, and calcaneofibular ligament.

Boston Children Hospital has a fantastic Just-In-Time resource for examining the ankle, including a video detailing the exam and the following ankle diagram, which provides a great overview of evaluating a patient with ankle pain. 

Ankle Pain Diagram from Boston Children's Sports Medicine Just-In-Time Training

To Image or Not to Image...

There are two major ankle rules you can use to aid in your decision whether or not to obtain an X-Ray for your patient– Ottawa and Low Risk Ankle Rules.  Dr. Berz reviewed the Low Risk Ankle Rule with us, which is summarized here.

Low Risk Ankle Rule

This graphic, from Boutis et al paper describes the low risk ankle rule, which has been validated for use in pediatrics.  In patients with tenderness isolated to the distal fibula and/or the lateral ligament complex, they may be treated conservatively without a radiograph.  Based on what your department has has available, using an ankle lacer or walking cast to support these injuries (without or without crutches depending on the patient’s age and ability to use them) and having them follow up with Orthopedics or Sports Medicine is appropriate management. 

These patients may have a Salter Harris I of the distal fibula, which is the most common ankle fracture in children.  However, the management of these patients would not change if you identified the SH fracture on imaging!  Still put them in an ankle lacer or walking boot and schedule follow up.

Important to remember– unless you are sure the child can stay off the foot, using plaster or Orthoglass to immobilize increases the risk of pressure ulcers (because no one can keep a kid who wants to walk from walking!).  Dr. Berz recommends not using this for immobilization if there are other options.

References

Boutis, K., Komar, L., Jaramillo, D., Babyn, P., Alman, B., Snyder, B., … & Schuh, S. (2001). Sensitivity of a clinical examination to predict need for radiography in children with ankle injuries: a prospective study. The Lancet358(9299), 2118-2121.

Boutis, K., Grootendorst, P., Willan, A., Plint, A. C., Babyn, P., Brison, R. J., … & Grimshaw, J. (2013). Effect of the Low Risk Ankle Rule on the frequency of radiography in children with ankle injuries. CMAJ185(15), E731-E738.

Leave a Reply